
 09/26/17
09/26/17
09/26/17
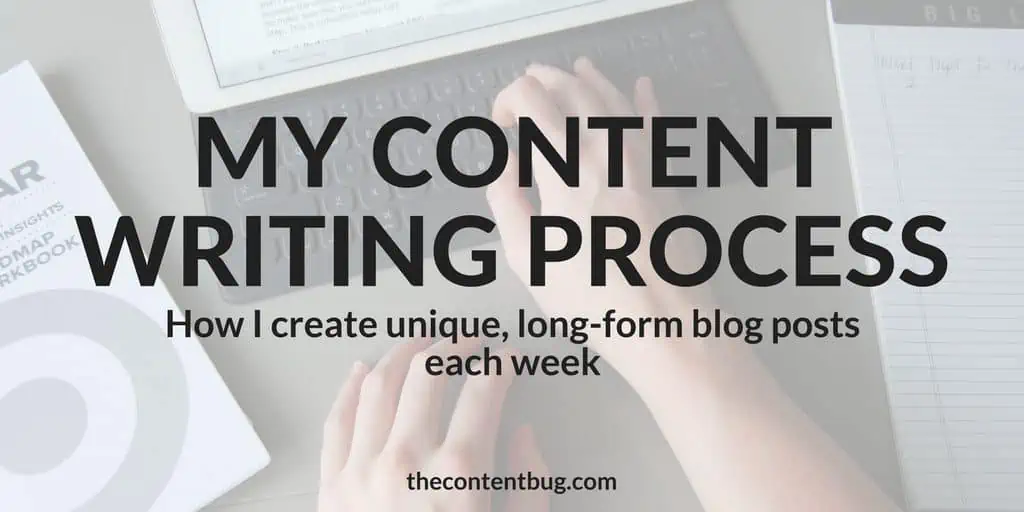
Writing fresh content week after week isn’t as easy as you may think.
Sure, writing for a blog can be a lot of fun. You get to set your own schedule and write about what you want to talk about. But it’s so much more than that.
A blog is one of the best places for businesses and website owners to entice their audience. With a blog, you get to inform while you captivate. But without really great content, your blog is a big waste of your time.
One of the most frequent questions I get asked is: how long does it take to write a blog post? And my response each time is… it depends!
The thing about blogging is that it’s different each time that you sit down to do it. The standards of blogging change. The topics in your niche change. And the wants of your audience change all the time!
There is nothing consistent about owning a blog other than your domain name… maybe. Because sometimes people even change that!
So when it comes to how long it takes to write a blog post, it all depends.
If I’m having a great day, it could take me an hour to write it and then an hour to edit it and it is ready to schedule for launch. But other days, it could take me a whole 8 hours.
Anyways, enough blabbing already! Let’s get to this blog post.
I’m going to walk you through a day in my life and tell you all about my content writing process for my blog posts. Let’s do this!
This post contains affiliate links. If you purchase a product or service with the links that I provide I may receive a small commission. There is no additional charge to you! Thank you for supporting TheContentBug.com so I can continue to provide you with free content each week! You guys are amazing!
Mondays are my content writing Monday’s. This means that I try to limit all my content writing for Monday’s. Then I can spend other days focused on other areas of my work. Because if it was up to me, I’d write 3 or more days a week!
So on Mondays, I focus all my energy on blog posts, email content, client content, social media post content, and that’s about it!
Anything related to content is jammed into a Monday. That way I start the week out with the thing I love most! And I stop dreading the work I have to do on Monday mornings.
Okay, okay. This may sound a little weird. But I do set the mood for my content writing.
I start the morning by meditating, reading, journaling, and cleaning up the house to start the day with a fresh mind and space. And when it’s time to get down to business and start writing, I light a candle on my desk and turn on a Spotify playlist.
I like to listen to more of a mellow style music when I write. And by mellow I mean Indie/Alternative music. My current favorite playlists on Spotify right now are Acoustic Summer, Morning Commute, and Soul Coffee.
I also like to put my phone in another room. I am soooo easily distracted with each text that comes in or social media notification that it’s bad for me to even have my phone around! So I like to remove my phone from the equation and just have my computer.
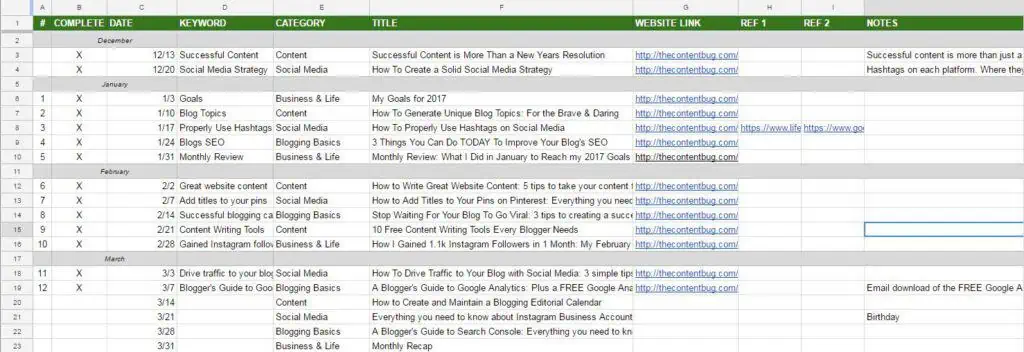
My life revolves around my content calendar. And I’m not kidding.
I start and end most days with looking at my content calendar. It holds all important information, including my blog posts, email content, social media content, and my promotional checklist.
So when I need to write some new content on Monday, I take a look at my content calendar and see what I can cover.
My content calendar is basically my rough draft of my schedule. I plan it out each month. And sometimes, I decide that I NEED to write about something that is not on my calendar. So I just go with it and try to remain flexible.
But that’s another reason why I am always looking at my content calendar. Because it’s always changing and I need it to stay up to date at all times!
So keyword research is different for every person. But I’m going to share how I do it.
At the beginning of each month or so, I perform some keyword research analysis from SEMRush and other keyword tools. Then I download a spreadsheet with all the information I need. From there, I highlight what I think are good opportunities for me to write about.
This gives me the big picture of what I need to write about and what to include in my content calendar.
So when it’s a Monday and I’m ready to start writing, this part of the research is already done. I just need to perform Pinterest research.
So I jump on over to Pinterest and search for the broad topic of what I plan to write about. For example, last week it was all about how I grew my email list. When I went to search Pinterest, I searched “email list”. Simple enough, right?
Then I look at some of the highest performing pins and the topic that they covered. I also look at the article titles to see what performs well and what doesn’t.
From there, I decided what are the best keywords to not only include in the post but also the title and the description of the pin. And that wraps up my keyword research process!
RELATED: Beginner’s Guide to Keyword Research
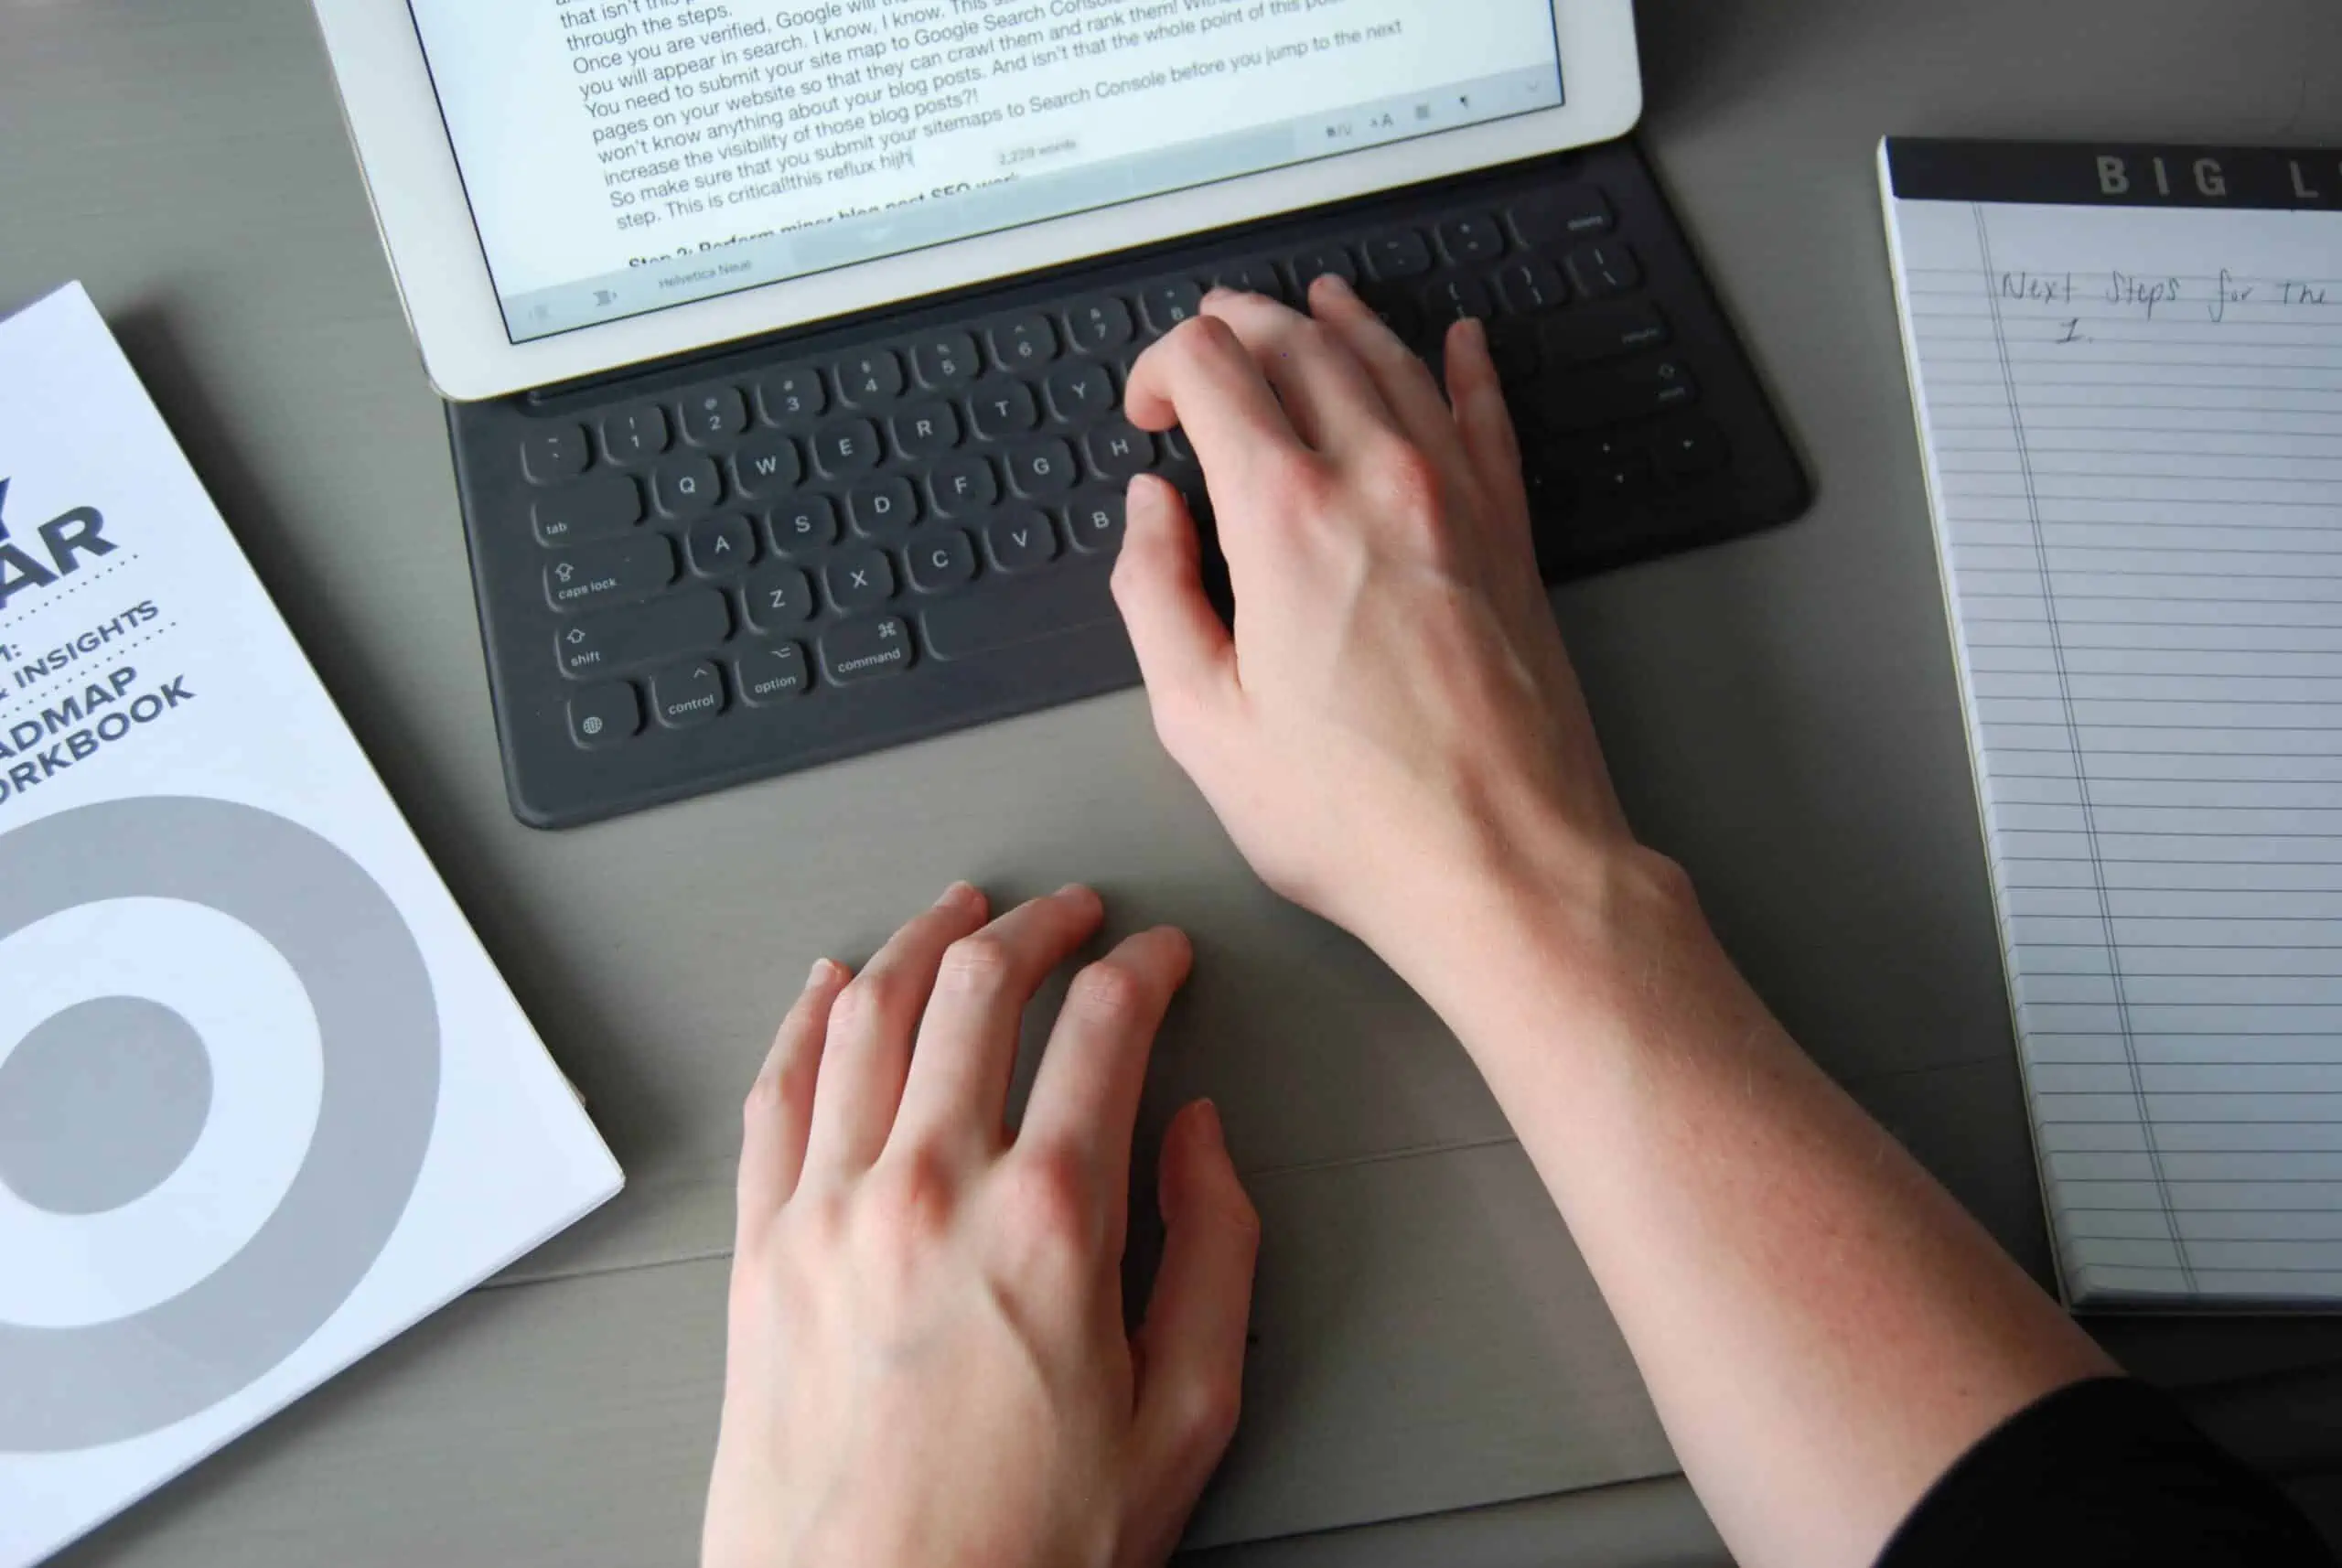
Once all that is done, I pull out my iPad Pro.
And just so you know, for story purposes, I have an iPad Pro and a work computer. But my work computer often doesn’t work too well. And when I try to write a blog post, most of the letters end up getting entered twice. So the words look something like this:
Soo tooddaay wee aarree gooiinng to ttalkk abbouutt bloooogginng.
And after each sentence, I have to go back and edit it to make it look like English again. And it ends up being a huge waste of my time!
So I start each blog post on my iPad Pro which has a keyboard attached.
I open up Pages (because I don’t need Word on my tablet) and I get to work. I let all my thoughts on the subject flow on the page and whatever happens, happens. Once I get to a point where the post is over 2,000+ words and it seems like a nice point to wrap it up. I come up with a closing and turn off my iPad.
Then I walk away and take a little break.
Once I’ve written the rough 1st draft, I email the blog post to myself to transfer it onto my work computer. From there I reread the post and rewrite areas that are either repetitive or complete word vomit from the process before.
This is generally a pretty rough read through. No serious editing is done at this point! This is just to confirm that my thoughts actually make sense.
Next, I move on to establish the structure of the post.
When I write, I naturally break it into sections. So my H2 tags and H3 tags are almost always already in place. So I don’t need to think about structuring the content in that sense.
But what I do think about is the placement of my social media graphics, ads, and other supporting images.
So at this point, I go through the post and find natural breaking points. Where does the post look like it needs a break because it has too many words? That’s generally where I will throw in my ads.
My Twitter image always goes at the beginning and my Pinterest graphic always goes at the end. And of course, the supporting images go with the content they support.
Now, when I mark the spot for the media I have to add, I do this by marking the area with [AD] or [IMAGE] or [TWITTER]. And all these mean something different to me. Plus, it’s pretty obvious and hard for me to ignore when I’m editing the post!
The actually adding of the images doesn’t come until a little bit later in the process.
Next, I like to run the post through my editing software. And I have a few of these that I like to use so this takes some time and ends up being the biggest editing process.
I start with Ginger. This is an app that I have built into my Microsoft Word on my work computer. It highlights areas that are incorrect and I can easily fix them right on Word.
Once that is done, I move over to the Hemmingway App. I’ve stopped using this as much because I now notice that areas that it would normally catch me on. But sometimes, it’s great to go back and see where I’m slacking.
And the last tool I like to use is Grammarly, which is built into my web browser.
After I’ve run the post through the first 2 editing programs, I can then copy and paste my blog post into my WordPress.org site.
Grammarly can be added to your website browser so that it edits everything you type on Facebook, your emails, websites, and so much more. But most importantly, it edits my posts right in WordPress!
So as my last step of editing, I review all the areas that are highlighted by Grammarly and fix the areas that need to be fixed!
RELATED: The Difference Between WordPress.com & WordPress.org
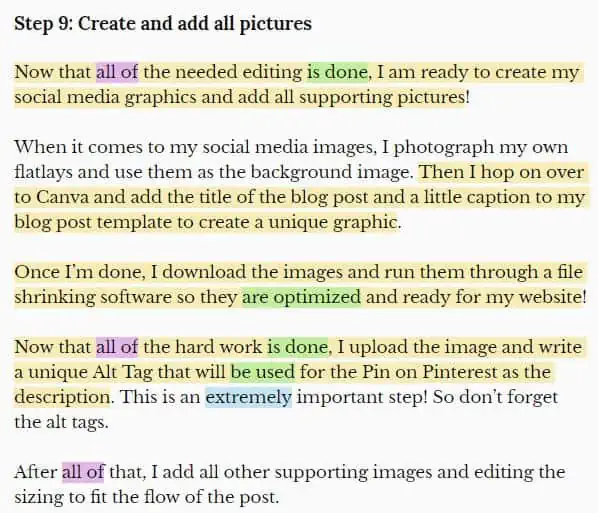
Now that all the needed editing is done, I am ready to create my social media graphics and add all supporting pictures!
When it comes to my social media images, I photograph my own flat lays and use them as the background image. Then I hop on over to Canva and add the title of the blog post and a caption to my template to create a unique graphic.
Once I’m done, I download the images and run them through a file shrinking software so they are optimized and ready for my website!
Now that all the hard work is done, I upload the image and write a unique Alt Tag that will be used for the Pin on Pinterest as the description. This is an extremely important step! So don’t forget the alt tags.
After that, I add all other supporting images and edit the sizing to fit the flow of the post.
Next comes the final touches of the post! Since all the editing was already done, there is nothing left to do on that end of things.
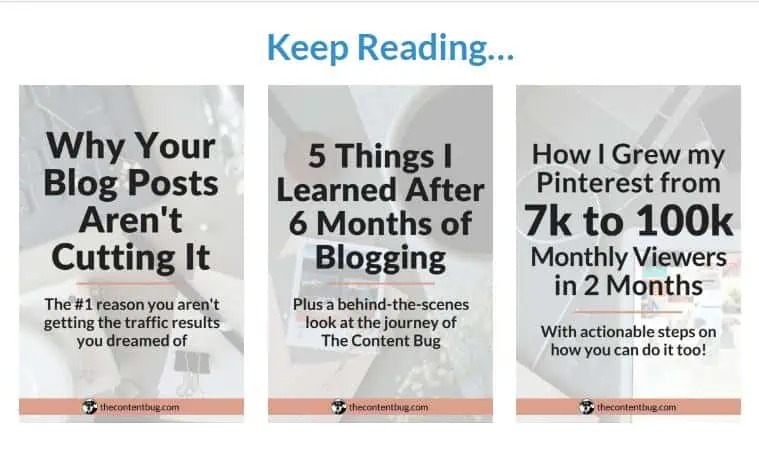
But I like to add my ads to the post and the footer information. This includes the Keep Reading section with what blog posts to recommend to my readers!
Although it may seem like a small step, it is extremely important to the success of the blog post!
Now, it’s finally time to get down and dirty with the SEO work. So at the bottom of the blog post in the Yoast Snippet, I determine the SEO title, meta description, and slug. Plus, I enter the keyword in the blog post.
The keyword was already determined before the blog post was even written in Step 3! But the other information is just now getting attention.
Once this information is filled in, I take a look at the SEO analysis. If there are any areas that need attention, I see what I can do to improve the SEO. I always try to see a green circle for my SEO section. But to tell you the truth, that doesn’t always happen.
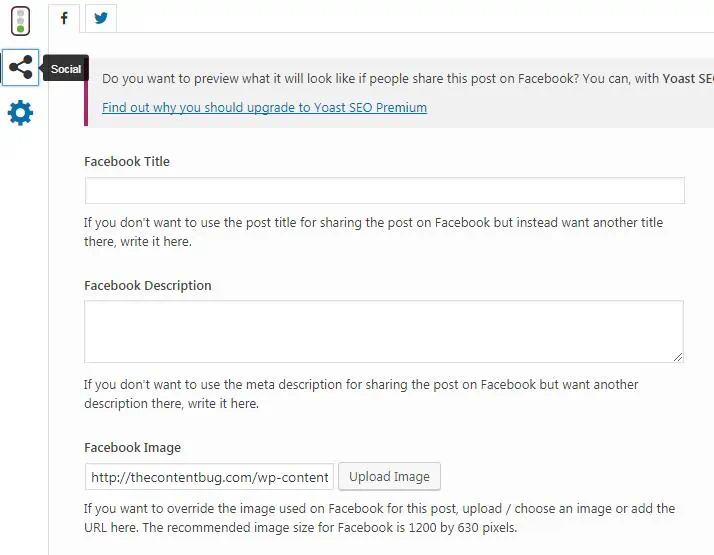
This is a step that is often forgotten by content creators! In WordPress Yoast, you can change the Twitter and Facebook featured images.
So I always change them to represent my Twitter graphic that is shared at the beginning of the blog post.
And after all of that… my blog post is now ready for launch!
I try to complete the blog post a week ahead of the date that it is scheduled to launch. But ya know, I’m human. So sometimes it doesn’t get done until the day before.
But with WordPress, you can schedule your posts to launch at a specific time. So that way I don’t have to roll out of bed every Tuesday morning and launch a new post. It’s just automatically done for me. Woot woot.

Now that was a lot of work, wasn’t it?! I mean when I first broke that into 13 steps, I was like dang girl! You do a lot more than you actually think about.
Because to be honest, this comes pretty naturally to me now.
I know what I’m doing. I know how to set the mood and get stuff done. And I know how to complete a blog post on time and with great interest!
But this took me awhile to get used to! Sometimes I look back at my old blog posts and giggle at myself. And that’s fine! Because I’m always learning and growing.
So now that the blog post is ready to launch there is still some work to do. You need to make sure it launched okay, promote the post, and schedule later promotions to keep the post alive long after it is launched.
But I’ll save that information for another day.
XO, Cath

 Why, hello there! I’m Cathrin, the creator of The Content Bug. But since we are already virtual best friends, you can call me Cath. After working in the digital marketing industry, I decided it was time to share my love for online content creation, social media, and SEO with the everyday hustlers of the world… like YOU! You can almost always find me at a local coffee shop writing, reading and working on new things for The Content Bug. But when I have some free time, I love hanging out with my dog, going to a yoga class, and being outside. Stay connected with me on Pinterest, Instagram, and Twitter to see what I’m up to!


LEAVE A COMMENT
7 responses to “My Content Writing Process”
Great information this really help me
It’s great to know that I’m not alone. Haha! But I don’t like to write in WordPress for the main reason that I use a variety of different editing apps. And one of them is hosted in Word and the other is just a website that I like to visit. And then, of course, my final editing tool is integrated with my WordPress.
To your point about Hemingway being easy to use: I found that this was true only once I adjusted to the whole color-coded methodology. like the features that free Hemingway provides, I’ve been researching similar alternatives and randomly found Grammarly and INK. {I’ve only used INK a couple of times but the interface seems less invasive and has some content optimization features as well.
Bravo Cath! You’re absolutely right that a blog post that seems effortless takes a lot of effort! Your process is awesome and very similar to mine (thanks for not making me feel crazy) – but I do have one question. Why not write directly in WordPress? I do sometimes draft out in Word, but I also like the mobile app of WordPress so I can draft on the go. Otherwise, keep getting it girlfriend!
Hey Kristina!
It’s great to know that I’m not alone. Haha! But I don’t like to write in WordPress for the main reason that I use a variety of different editing apps. And one of them is hosted in Word and the other is just a website that I like to visit. And then, of course, my final editing tool is integrated with my WordPress.
But I’m also kinda afraid that if I write in WordPress I’ll accidentally publish it before it’s ready! I know you can schedule the post early on so you don’t risk it getting launched, but I still hold a little fear over that lol.
XO, Cath
Wow. I am tired just reading. Great information.
Hahah it’s a lot of work, that’s for sure!
Thank you for reading!
XO, Cath